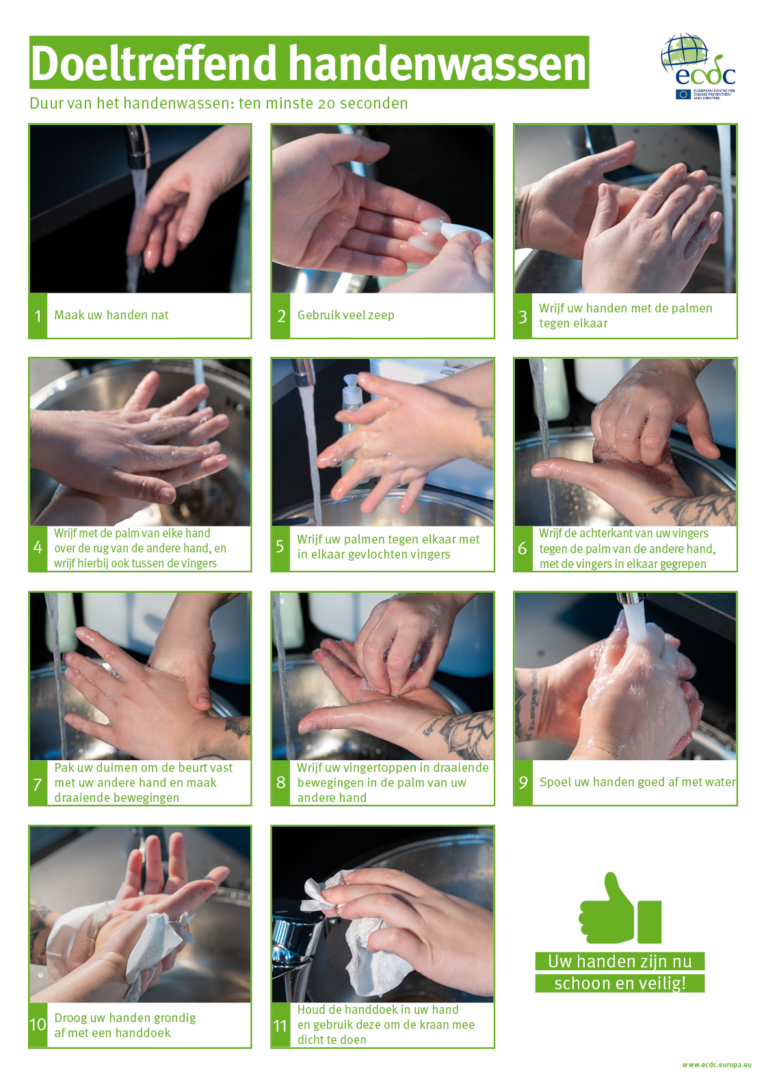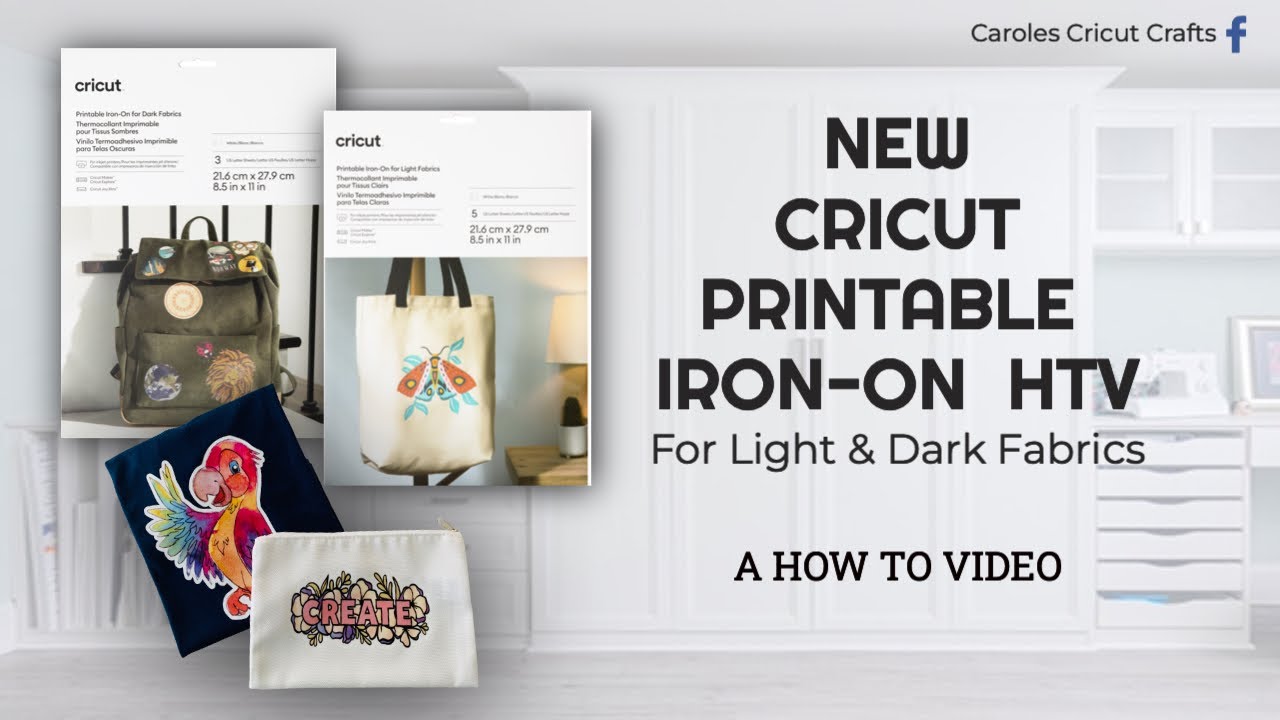
Craft with Confidence: A Guide to Cricut Printable Iron On
In the realm of crafting, Cricut printable iron on has emerged as a game-changer, empowering creators with endless possibilities for personalized designs. This innovative material seamlessly blends the convenience of digital printing with the durability of heat-applied adhesion, opening up a world of creative expression.
From custom t-shirts and tote bags to eye-catching home décor, Cricut printable iron on transforms ordinary surfaces into canvases for your imagination. Its versatility and ease of use make it an ideal choice for both seasoned crafters and those just starting their creative journey.
Cricut Printable Iron On

Innit fam, listen up! Cricut Printable Iron On is the bomb diggity for customising your clobber. It’s like a blank canvas for your imagination, letting you unleash your inner artist and make your gear as unique as you are.
So, let’s get the lowdown on this game-changer and how it can elevate your style game to the next level.
Types of Cricut Printable Iron On
- Everyday Iron-On: Your basic iron-on, perfect for adding names, numbers, or simple designs to T-shirts, hoodies, and more.
- Premium Iron-On: The Rolls Royce of iron-ons, designed to last longer and withstand more washes. Ideal for intricate designs and projects that need a bit more oomph.
- Glitter Iron-On: Bling it up with glitter iron-on! Add a touch of sparkle to your clothes, bags, or accessories.
- Foil Iron-On: Create metallic accents with foil iron-on. It’s perfect for adding a touch of glam to your projects.
Benefits of Using Cricut Printable Iron On
- Customisation Galore: Unleash your creativity and make designs that are totally unique to you.
- Durable and Long-Lasting: Most iron-ons are designed to withstand multiple washes, keeping your designs looking fresh.
- Easy to Use: With a Cricut machine, designing and applying iron-ons is a breeze.
- Cost-Effective: Compared to other customisation methods, iron-ons are a budget-friendly option.
How to Use Cricut Printable Iron On
- Design Your Project: Use the Cricut Design Space software to create your design.
- Print Your Design: Print your design onto the Printable Iron On using a regular inkjet printer.
- Cut Your Design: Load the Printable Iron On into your Cricut machine and cut out your design.
- Weed Your Design: Remove the excess iron-on material around your design.
- Apply Your Design: Place your design onto your project and press it on using a heat press or iron.
- Use a sharp blade for clean cuts.
- Weed your design carefully to avoid tearing the iron-on.
- Use a heat-resistant mat to protect your work surface.
- Follow the manufacturer’s instructions for the specific type of iron-on you are using.
- Let your project cool completely before handling it.
Tips for Using Cricut Printable Iron On
Frequently Asked Questions
What is the difference between printable iron on and traditional iron on?
Printable iron on allows you to print your own designs directly onto the material, while traditional iron on requires you to cut out pre-printed designs.
Can I use Cricut printable iron on on any type of fabric?
While Cricut printable iron on is compatible with a wide range of fabrics, it’s important to check the specific material requirements for optimal adhesion.
How do I ensure a strong and long-lasting bond when applying Cricut printable iron on?
Proper application techniques, including using the correct heat settings and applying sufficient pressure, are crucial for achieving a durable bond.